Hello, and welcome to this ApexSQL Build general overview video. ApexSQL Build is a SQL server development tool which can build databases, build scripts or executable installers from SQL scripts, scripts folders, snapshots, or source control projects.
ApexSQL Build also supports database builds for SQL Azure databases and Amazon RDS for SQL server. ApexSQL Build can also automate and schedule database builds using the command line interface or CLI, build databases from one environment to another, consolidate multiple SQL scripts into one SQL script, preview the script impact, ensure error-free deployments, and more.
ApexSQL Build also supports picking specific SQL objects along with automatically including any dependent ones and creating executable installation packages that users can run independently without installing any other software.
ApexSQL Build consists of two main components, a Windows application used for manual database builds, selecting specific objects and static data, and various options for the build process; a console application which allows users to schedule and automate database builds unattended.
Let's begin our tour of ApexSQL Build. After the application has started, the main application window will show where the Build, Update, or Consolidate actions can be chosen from the Home tab. Also, previously saved projects can be selected from a list and opened.
For the purpose of this video, we'll start with the build action from the database section. Once the Build action is clicked, the Output Type step will show with four different output types to choose from. One, Database; two, SQL Script; three, C# Solution; and four, Executable Installer. The Database option will be chosen as an output type to deploy directly to a SQL server.
In the next step the input source should be selected from which SQL objects will be loaded for a new database build. Four different input sources can be selected. One, SQL Script; two, Scripts Folder; three, Snapshot; and four, Source Control Project.
Let's select the Source Control Project as an input source, and click the Setup button next to it to set the source control login information. In the first step of the Source Control Wizard, choose the Source Control System. In this example, Gt will be chosen from the dropdown. The other available systems are Mercurial, Perforce, Subversion, and Team Foundation Server.
In the next step of the Source Control Wizard, system login information should be set including the Username, Password, Repository, Branch, and Project. Once all of the information is provided, click the Finish button in the Source Control Wizard and all information will be loaded in the input source step.
After the input source is defined, click the Next button and the Connect To SQL Server step will be shown. In this step, a SQL server where a database will be built should be provided along with the authentication type.
In the database options step, configuration can be customized in order to create a new database. The database creation script can be used in three different ways. One, from source control where at database creation script was saved during the commit process; two, from a script which can be located locally on the machine; or three, by configuration if the script doesn't exist it can be created from the application. All database configuration options can be loaded with a click on the Get Database Properties From Input Source button without the need to set each one individually.
Build objects is the next step in the build database process. And here all objects or a subset can be checked for the build process. By default all SQL objects will be pulled from the input source, source control project in this case, and all SQL objects will be checked by default. So it's up to the user to uncheck specific objects.
The preview step contains two tabs. One, the Summaries tab, contains the summary of all actions that will be taken during the build process such as creating a table. Two, the Dependencies tab contains SQL objects that are included in the build process indirectly because they are referenced by previously checked SQL objects in the build objects step, and leaving them out may result in build errors.
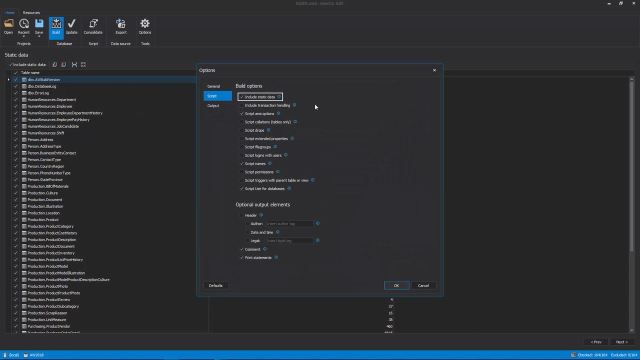
Once everything is reviewed, the next step is the static DATA step. Here we can see if there is any static data in the Loaded Source Control Project or Scripts folder. By default, the Include Static Data option is checked under the Script tab of the Options window, and if there is static data the static DATA step will be shown, otherwise it won't.
Also other build options can be set here as well along with the option output elements that will be included in the build script. Once the static data is included, optional post deployment scripts can be loaded in the next step if there is a need to execute any SQL script immediately upon creating the new database.
In the last step, the output option step, there are two tabs for setting any final options before the build process is initiated. One, the Script tab in which file location and name can be provided in order to save the build script. Two, the Optional Information tab in which the previously mentioned optional output elements can be set along with the script's Version Number option and to Increment Build Number Automatically option.
If a database needs to be built several times, for example, for testing committed objects to a source control repository on a local SQL server, it can be easily automated by creating a batch file that can be scheduled via SQL Server Job or Task Scheduler. To create and save the batch file, click the Save As Batch button in the bottom left corner of the last step of the build process and the Save As Batch window will be shown.
As displayed, the batch script will contain all CLI switches for options that have been set as the project was constructed. Additionally, a project file can be created and saved, and it will
 08:07
08:07